Detalles:
Peso: varía en base al sistema operativo
Licencia: Freeware
Requiere: Cualquier distribución reciente de Linux con librerias GTK2:
Fedora, RHEL, Ubuntu, Mint, Mandriva y muchas otras
DESCRIPCIÓN:
Fopnu es un potente pero ligero sistema de condivisión de archivos P2P.
Fopnu está pensado para ser fácil de usar y no tiene dependencias .Net o Java. Viene visualizado por una interfaz
personalizable e intuitiva que puede ser explorada eficazmente y de manera fácil aún por los usuarios más inexpertos. Está subdividido en 6 pestañas principales; red, librería, chat, búsqueda, trasferencia y ancho de
banda. Las pestañas de red y ancho de banda permiten visualizar y configurar una conexión específica para los download.
La conexión de Fopnu está criptografiada para garantizar que los archivos que compartamos sean seguros e incluyan una infraestructura a llave pública
descentralizada. También disfruta el protocolo UDP puro que utiliza la
corrección de los errores hacia adelante. Todos los archivos compartidos son
indicizados localmente y no hay transmisión alguna a otros usuarios. Otro aspecto interesante es que Fopnu utiliza un
sistema de token para distribuir el ancho de banda en modo equitativo entre
todos los usuarios. La transferencia de los archivos ocurre a través de un método directo o recombinando y recodificando los bloques sobre todos los nodos.
La versión Linux de Fopnu ha sido bien testeada en Fedora, Ubuntu, Mint y
Mandriva Linux. Debe funcionar también en cualquier otra distro
Linux reciente siempre que GTK2 estè instalado. Están disponibles versiones para 32 e 64 bit.
- Fopnu tiene ventajas respecto al resto, además es simple, atractivo y fácil de usar, así que no tienes porque limitarte al amule a la hora de querer descargar un archivo fácilmente
En el siguiente artículo vamos a revisar Ocenaudio. Este es un editor de audio multiplataforma, fácil de utilizar, rápido y funcional.
Es el software ideal para personas que necesitan editar y analizar
archivos de audio sin complicaciones. Esto no significa que no tenga
también potentes funciones que complacerán a los usuarios más avanzados.
Este software se basa en Ocen Framework. Esta es una potente
biblioteca desarrollada para simplificar y estandarizar el desarrollo de
aplicaciones de análisis y manipulación de audio en múltiples
plataformas. Ocenaudio es de uso gratuito y de gran alcance.
Es verdad que la mayoría de las veces al pensar en un editor de audio, la mayoría pensamos en Audacity y algunos otros editores del mercado. Estos posiblemente cumplan con
todos los requisitos de edición de audio. Pero bien es cierto que pueden
ser un poco difícil para un usuario que acaba de empezar. Al menos les
resultará complicado de utilizar sin necesidad de buscar alguna guía o
directamente buscar por internet. Ocenaudio llena ese vacío. Incluso una persona sin experiencia puede utilizar ocenaudio y obtener un buen trabajo.
Características generales de Ocenaudio
Ocenaudio está disponible para todos los sistemas operativos más
populares: Microsoft Windows, Mac OS X y Gnu/Linux. Esto significa que vas a poder utilizar Ocenaudio en cualquier equipo.
La aplicación de efectos de sonido tales como ecualización, ganancia y
filtrado es una parte importante de la edición de audio. Sin embargo,
es muy difícil obtener el resultado deseado ajustando solo la
configuración de los controles ya que tenemos que escuchar el audio
procesado. Para facilitar la configuración de los efectos de audio,
Ocenaudio tiene una función de “vista previa” en tiempo real. Se oye la señal procesada mientras se ajustan los controles.
La ventana de configuración de los efectos también incluye una vista en miniatura de la señal de audio seleccionada.
Vamos a poder navegar por esta vista en miniatura de la misma manera
que en la interfaz principal. Solo tendremos que seleccionar las partes
que nos interesan y escuchar el resultado del efecto en tiempo real.
Vamos a poder seleccionar simultáneamente diferentes partes de un archivo de audio y escuchar, editar o incluso aplicar un efecto
a ellas. Por ejemplo, si deseamos normalizar solo los extractos de una
entrevista donde habla el entrevistado, no tendremos más que
seleccionarlos y aplicar el efecto.
Para utilizar este programa sólo tendremos que visitar la página web de Ocenaudio
y allí podremos encontrar y descargar la versión compatible con nuestro
sistema Ubuntu. Cuando queramos instalar el paquete descargado solo
tendremos que abrir una terminal (Ctrl+Alt+T) y escribir en ella:
1
sudo dpkg -i ocenaudio_*.deb
Tras la instalación ya podremos buscar el lanzador en el Dash de nuestro sistema.
Edición de los archivos de audio
Como ya he dicho Ocenaudio es muy fácil de utilizar. Vamos a poder
abrir la canción o el archivo de audio que queramos editar de manera muy
rápida. Solo tendremos que dirigirnos a la parte superior de la
pantalla principal. Allí podremos abrir el archivo de audio deseado
eligiendo “Abrir” en el menú “Archivo”.
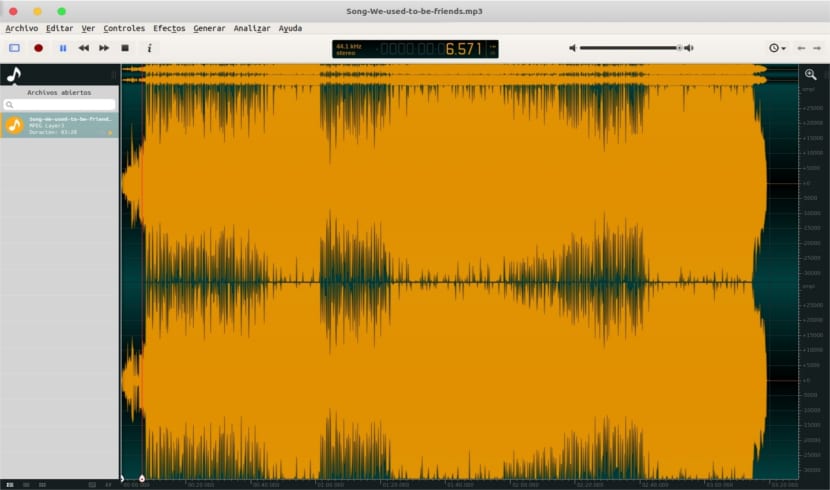
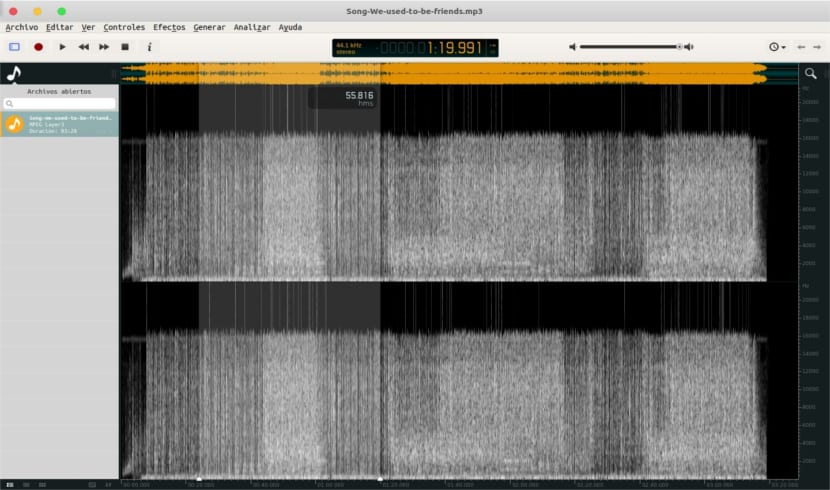
Al escoger el archivo de audio, obtendremos una pantalla de aspecto
simple que nos permitirá elegir fácilmente la longitud del audio que
queramos realizar.
Basta con elegir la parte con el ratón si deseamos cortar, copiar o pegar
(disponible a través del menú del botón derecho después de la
selección). Vamos a poder cambiar la vista de espectro a otros formatos
utilizando menú “Ver”. Para mí, la vista de espectral es más cómoda para
trabajar.
También vamos a poder generar efectos avanzados. Sin
embargo, un usuario normal y corriente es más que probable que los
llegue a necesitar. Si simplemente quieres mezclar audio para una
fiesta, cortar algo o añadir algo, con las opciones básicas seguro que
conseguirás un resultado bueno.
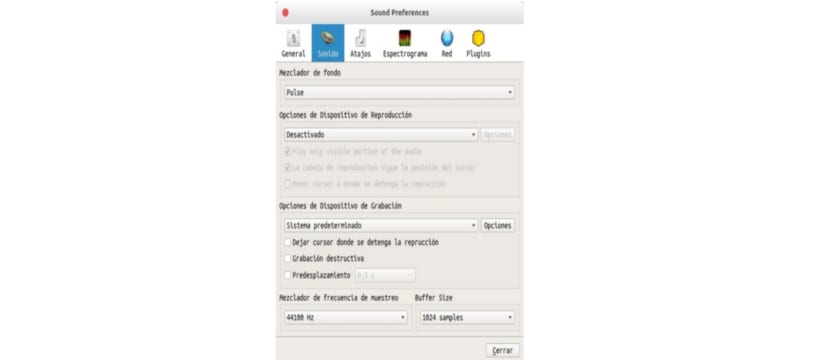
También vamos a poder cambiar las preferencias de sonido según nos interese. Esto lo conseguiremos desde el “control de ocenaudio” al cual podremos acceder desde la opción Editar > Preferencias.
Desinstalar Oceanaudio de Ubuntu
Para eliminar este programa de nuestro sistema operativo no tendremos
más abrir una terminal (Ctrl+Alt+T). En ella escribiremos la siguiente
secuencia de comandos:
Hay muchos programas que nos permiten grabar la pantalla de
nuestro PC, pero aquí vamos a hablar de uno muy bueno y completo. Se trata
de Simple Screen Recorder, un programa que, como su nombre indica, es un software simple que nos permitirá grabar la pantalla de nuestro computador.
En un principio, SSR fue creado para grabar la salida en imágenes de
programas y juegos, algo que ha conseguido manteniendo su sencillez de
uso al tiempo en el que mejoraba como opción.
Aunque Simple Screen Recorder es compatible con muchas distros como Fedora, CentOS o RHEL, en este post les enseñaremos a
instalarlo en Ubuntu y otros sistemas operativos Linux basados en Debian o Linux Mint. Instalaremos SSR en Ubuntu y todas las distros basadas en él siguiendo los pasos que detallamos a continuación.
Cómo instalar Simple Screen Recorder en Ubuntu
Para instalar SSR lo único que tenemos que hacer es
abrir un terminal y escribir los siguientes comandos:
De los comandos anteriores, el primero nos añadirá el repositorio
necesario para instalar Simple Screen Recorder, el segundo actualizará
los repositorios y tercero instalará el software.
Cómo grabar la pantalla de nuestro PC con Simple Screen Recorder
Lo primero que tendremos que hacer, lógicamente, es abrir SSR. Para
ello, basta con que presionamos la tecla de Windows e introduzcamos el
texto “Simple”, lo que hará que aparezca el icono del software. En otros
sabores de Ubuntu, buscaremos Simple Screen Recorder desde el menú de
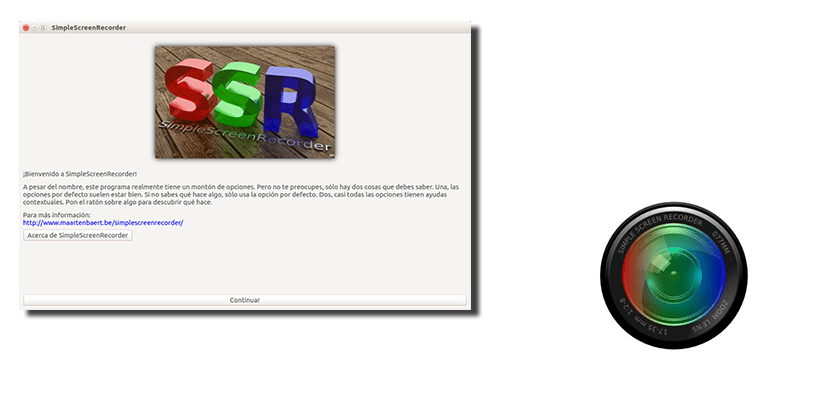
aplicaciones. Seleccionamos el programa y aparecerá una pantalla como la
que veis encabezando este post. Lo único que tenemos que hacer en este
momento es clic en “Continuar”. A continuación veremos una ventana como
la siguiente:
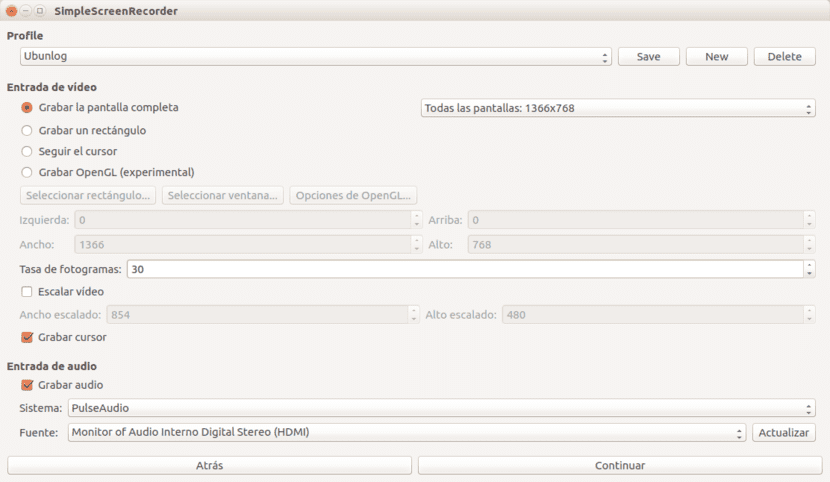
Aunque no lo parezca, grabar la pantalla con SSR es muy intuitivo.
Podremos grabar casi directamente sin modificar muchos valores, sólo
haciendo lo siguiente:
En “Entrada de vídeo” elegiremos si grabar a pantalla completa,
sólo un rectángulo, seguir el cursor o, en estado experimental, Grabar
OpenGL.
En “Entrada de Audio”, elegiremos qué audio recoger. Esto lo configuraremos en el apartado “Fuente”.
Hacemos clic en “Continuar”.
En la siguiente ventana, en “Archivo”, le damos un nombre a la grabación.
Si lo deseamos, marcamos la casilla “Separar por segmentos”, pero yo
prefiero grabar toda la acción tal cual y luego editarla yo mismo en
otro programa.
En “Contenedor” elegimos el formato en el que queremos guardarlo.
MKV está bien, siempre y cuando no necesitemos cierto nivel de
compresión, en cuyo caso puede ser buena idea guardar el archivo como
MP4.
En el apartado “Vídeo” elegiremos qué códec queremos usar. De los que nos ofrece, yo dejaría la opción por defecto.
En el apartado “Audio” haremos lo mismo que en el paso anterior, es
decir, elegir el códec y elegir la tasa de bits. Yo prefiero que el
códec de audio sea MP3 para evitar problemas de compatibilidad futuros.
Si el audio es importante para vosotros, también podemos subirle el
valor de la tasa de bits.
A continuación, hacemos clic en “Continuar”.
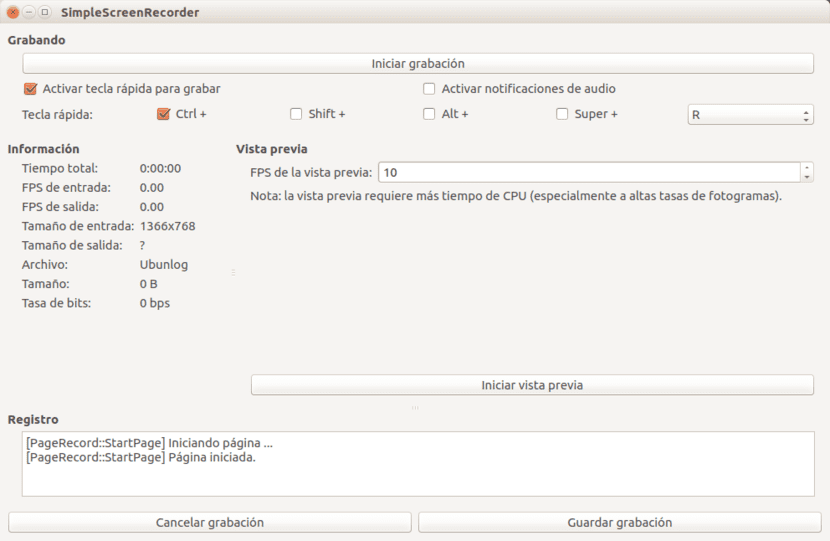
En la siguiente ventana podemos configurar los
controles que usaremos para iniciar la grabación. Por defecto, la
combinación de teclas es “Ctrl+R”.
Si hacemos clic en “Iniciar grabación”, el programa empezará a
grabar todo lo que ocurre en nuestro PC, audio interno incluido (si así
lo configuramos).
Una vez terminado el tutorial o lo que queramos grabar, podemos
hacer clic en “Pausar grabación”, tanto en la pantalla que ha aparecido
en el paso 10 como desde el icono del tray que habrá en la barra
superior.
Por último, haremos clic en “Guardar grabación”. Por defecto, el
vídeo grabado aparece en nuestra carpeta personal y tendrá el nombre que
le hayamos configurado en el paso 4 de los descritos en este tutorial.
Ahora ya podemos editarlo con cualquier programa y luego compartirlo por
cualquier medio.
Como pueden ver, la palabra “Simple” del nombre del programa no
miente. A diferencia de otros sistemas, como el que nos permite grabar
la pantalla con el reproductor multimedia VLC, grabar
la pantalla de nuestro PC con SSR es mucho más sencillo al mismo tiempo
que nos ofrece las mismas o incluso más opciones que en otros programas. Así que instalenlo y disfrutenlo.
Docky es un dock que le da a nuestro Ubuntu o Linux Mint una apariencia semejante a la que presenta MacOs. Al instalarla vemos que el primer ícono del lado izquierdo es el ancla que representa al programa. Para retirarla debemos tener instalado en primer lugar el paquete gconf-editor , lo que podemos hacer desde la terminal o desde Synaptic y luego seguiremos los siguientes pasos:
1. Presione Alt + F2
2. Escriba el comando gconf-editor y pulse enter/return
3. Navegar a apps/docky-2/docky/items/DockyItem en el gconf-editor
4. Desactive ShowDockyItem
5. Reinicie docky
This content will touch upon all the
categories for selecting Best Linux software. Basically, this is a
compilation content of all other top best list content which already
published in this site, thus it’s going to help you to get all the Best
Linux apps in one place based on various categories. As UbuntuPIT mostly
deals with Ubuntu Linux, so I will focus on the installation process.
This content will grow every day as and when a new Linux list content gets published.
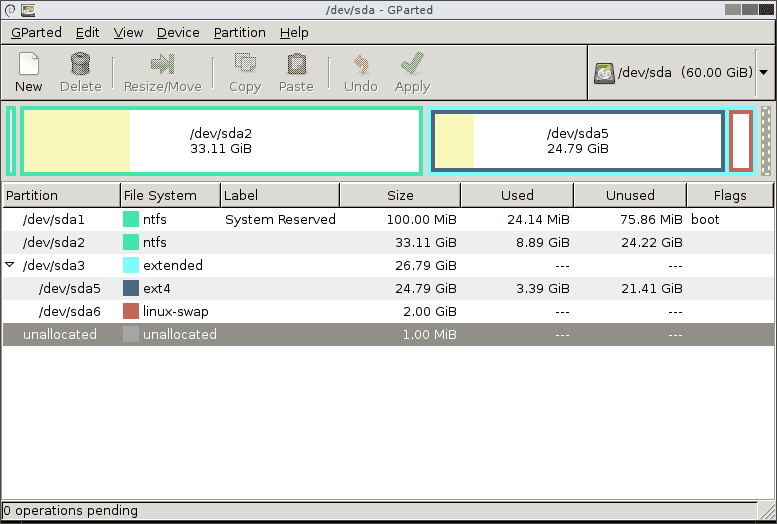
1. Best Partition Manager – Gparted
There are lots of choices comes to mind when the question arises aboutbest Linux Partition Manager.
If you are a new Linux user or not comfortable with text-based
partition manager then GUI based Gparted is the best option for you to
choose. You can do almost all the task of disk partitioning using this
free and open source partition manager. Download Gparted
2. Best PDF Editor – LibreOffice Draw
PDF is considered as the best way of
emailing, sharing or printing various documents. It’s a well-supported
format across all the OS including Linux, Windows, Mac OS, Android and
much more. There are many good options out there for selecting best Linux PDF Editor for each and every OS. LibreOffice Draw
is one of them which comes preinstalled in all the major Linux distros.
It’s a free and open source Linux pdf editor which let you fulfill the
basic task. Master PDF Editor is another one which comes with lots of
features and tools for editing PDF files in Linux but it’s not a free
and open source. Download LibreOffice
3. Best LaTeX Editor – TeXmaker
In the arena of Linux, LaTeX is
considered as a standard markup language. It helps the users for editing
the documents to markup level. TeXmaker is one of the best LaTeX editor available out there. It’s to be the most user-friendly LaTeX IDE for the newbie. Download TeXmaker There are lots of best LaTeX Editor
available for Linux but it seems difficult to choose the Best LaTeX
Editor for both advanced and beginner. For that reason, I have written a
detailed LaTeX tutorial and how to install those on Ubuntu Linux which
will help you to get the best one. Please see the resource link for that
tutorial.
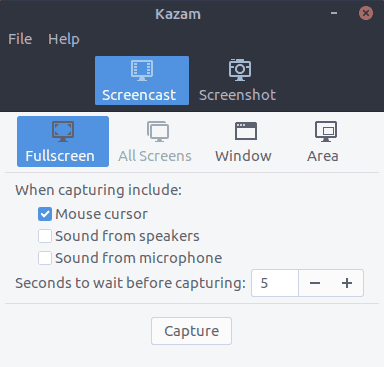
4. Best Screen Recorder – Kazam
Screencasting is an important task
for many people for many reasons including making a video tutorial,
creating a presentation, compiling a how-to tutorial or do a software
review or having the fun of streaming while playing pc games. Moreover
now a day many users are making an earning opportunity for themselves
through YouTube, Facebook video or any other video hosting sites by
making many helpful how-to guide videos. Kazam is one of the best lightweight screen recorder available for Linux desktop. It’s very simple and nifty tool for screencasting. Install on Ubuntu
Run the following command into the Terminal:
sudo apt install kazam
There are lots of Linux screen recorder available in the market but here I am only going to share a list of best Linux screen capture and Live video streaming software, and how to install those on Ubuntu as this site focuses only on Ubuntu Linux.
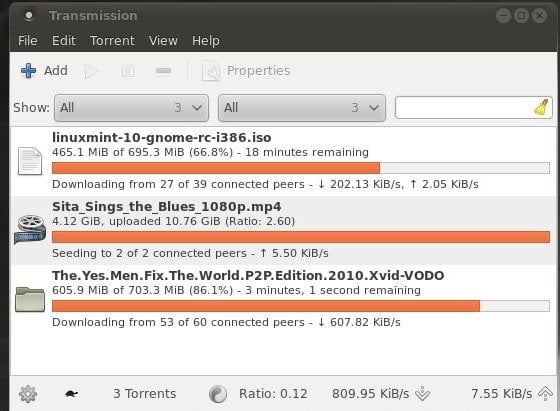
5. Best Torrent Client – Transmission
If you are searching for something that is completely free, open source and comes with minimum configuration, then Transmission torrent client is one of them. It supports cross-platform like Windows, Linux, Mac OS, and Unix based systems. Download Transmission There are lots of popular torrent
clients available in the market. But it’s really difficult to find out
which one comes with the best set of features. Here I am reviewing and
sharing a set of open source torrent client for Linux so that you don’t need to waste your valuable time by installing and checking all those torrent clients one by one.
6. Best FTP Client – FileZilla
FTP ( File Transfer Protocol ) is one
of the great and efficient ways of transferring files over a TCP based
system like the internet. It helps to move a large number of computer
files from one host or system to another host or system without any
hassle and complexity. FileZilla comes on top of this list of best Linux FTP Client.
This is one of the best and secured FTP client for all the major
platforms like Linux, Unix, Windows, and MacOS. FileZilla is reliable
and fast FTP, FTPS and SFTP client for Linux. Install FileZilla on Ubuntu via PPA
Run the following command to install FileZilla on Ubuntu:
To recover from some unexpected
situations like human errors, Disk failure or RAID, Corruption of file
systems we need a good backup plan. Bacula is an Open Source Backup Software.
This enterprise level computer backup system can work in various
networks. It is an automated task that need not require intervention
from a systems administrator or computer operator. Bacula supports
Linux, UNIX, and Windows backup clients.
8. Best Note Taking App – Simplenote
Simplenote is the best note taking app for Linux right now. It provides all the features that a modern and professional note-taking app must have. Download & Install Simplenote As we know that Evernote is one of
the best and top graded note taking apps for all the major OS. But
Evernote doesn’t provide an official client for Linux. That’s why I have
created a tutorial which will offer you a list of best Linux note-taking apps ( Evernote Alternative ).
9. Best Terminal Emulator – GNOME Terminal
Gnome Terminal emulator is one of the best Linux Terminal Emulators for Linux Gnome desktop environment. It has lots of effective and useful features that make it standalone from others. Though most of the users are
satisfied with the default Terminal emulator of their Linux
Distributions. But the option is always open to trying a different one
and get settled with that. Here I am going to share a generic list of 15
Best Linux Terminal Emulators for both beginners and advanced Linux users.
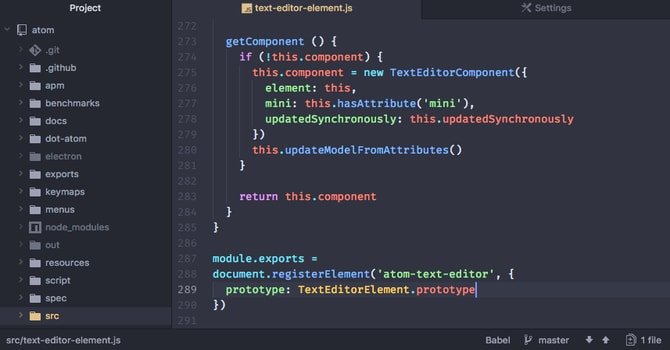
10. Best Code Editor – Atom
Coding is a great fun. You can make
useful and great apps for your operating system if you can learn well
how to do coding. To be a great applications developer, you have to know
about all the details of coding or programming in various applications. Atom is a Linux code editor that
is smart, trendy, approachable, and yet customizable to the core. This
excellent Linux text editor offers you to customize it to do anything
you want. There are various types of code editors or text editors
or HTML editors for several operating systems which are available to
make your coding capability easy and quick, while some of them have
worked really great across the OS. To create new software in Linux,
there are lots of Linux code editor available out there; those can make you an expert Linux code developer.
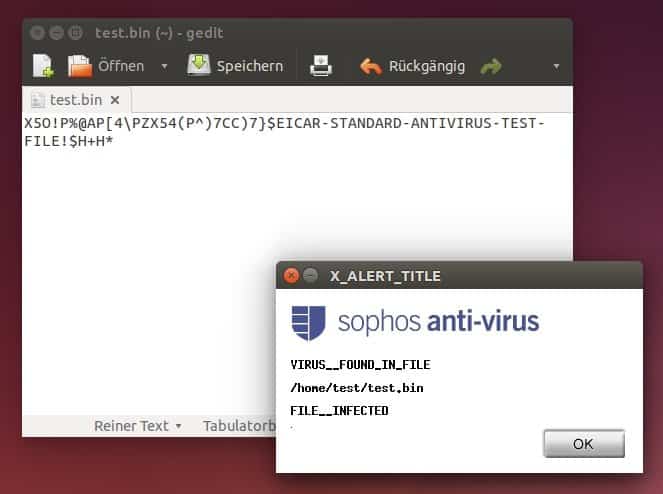
11. Best Linux Antivirus – Sophos
In the world of computer Operating
System, there is always errors and problems especially intentionally
made errors which we call trojan, malware, virus. Linux OS is much more
efficient and secure OS but still, there are possibilities to have these
problems. To decreasing this issues, security specialist has developed Linux antivirus to detect and remove those threats before they harm the system.
In the AV-Test, Sophos is
one of the best free antiviruses for Linux. It does not only support
on-demand scanning but also provide real-time scanning feature.
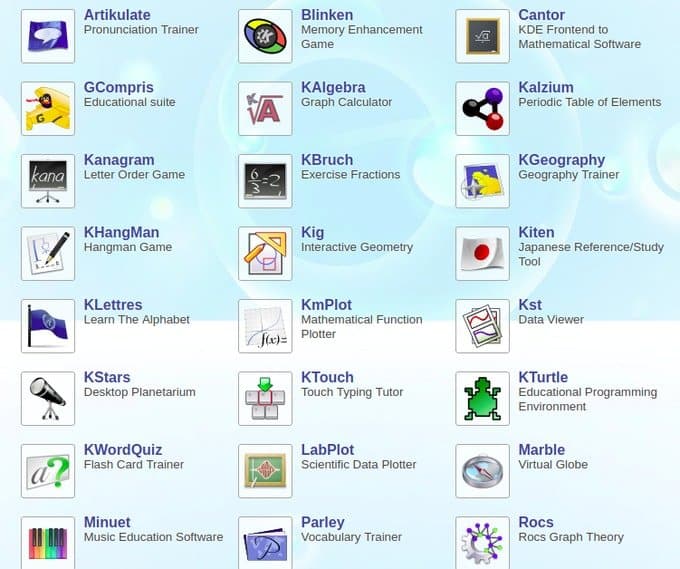
12. Best Educational Software – KDE Edu Suite
An educational expense is always high
all over the world. This expense will be more if you want to use
educational software on your machine. You may be searching over the net
to get the best educational software for the kids or yourself. KDE Edu suite is
not just a software, it is a package of software for different user
purpose. Actually, this was started as a free educational package named
as KDE educational project which now included lots of software package. Installation of KDE Edu Suite:
KDE Edu Suite can be installed on most GNU/Linux distributions, It
can be also installed from software center. If not found, you can
install the latest KDE Edu Suite on Ubuntu/Mint by typing the following
commands in the console:
If you are a student you may have
doubt in mind that Linux rarely provides software which supports
educational purposes. Wait a minute ……….. You should correct yourself
now as you will see a great list of Best Linux Educational Software.
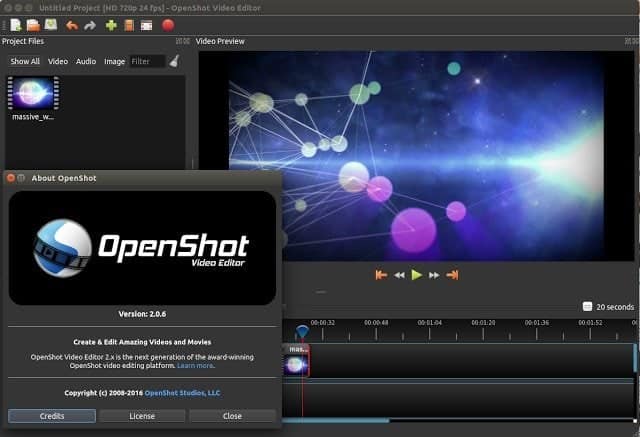
13. Best Video Editing Software – Open Shot
Video editing on Linux is very easy if you find the best Video Editing Software. There is a lot of open source Video Editing Software available on Linux. You can easily customize or edit any kinds of media files with those Video Editing Software. Open Shot video editor is an open source Video Editing Software on Ubuntu. It works really well in the other distribution of Linux. Installation on Ubuntu:
Open Shot Video Editor is very easy to install on Various Linux distribution. You can install it from the software center or use this command:
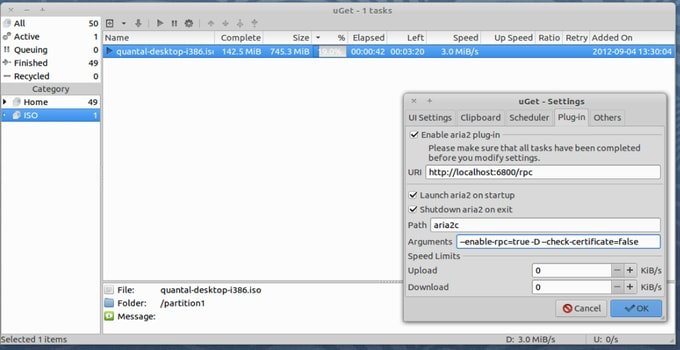
It’s obvious to have a good download manager for Linux
or Ubuntu. Though all the modern browsers have default download
manager, it’s not good enough to handle effective downloading system.
When the question comes whether a web browser can handle multiple
download, pause system, torrent integration or speedy download, then the answer is not satisfactory. uGet is
an open source download manager for Linux which will download your
files fast. This download manager can be easily organized and highly
configurable. You can control your downloads in one central place. uGet on Ubuntu
It is very simple to install uGet on Ubuntu. Just follow the instructions below:
A download manager required when you
go for downloading big files or multiple files. So as you are a user
coming from windows or a newbie Linux user or advanced user.
15. Best Video Players – VLC
VLC Media Player is one of the best and most popular Best Linux Software
in the category of video players. It is an open source media player
which support almost all media file types on Linux. VLC Media Player
support network shares browsing, downloading subtitles, video playlists,
pop-up video and etc. There are a lot of video players available for Linux.
Those video players mainly do the same thing to play a video file. So,
you need to find which video player will offer you the additional
features of playing any video. Here I will be sharing top 10 free and best Linux video players with the best features that each and every app offers.
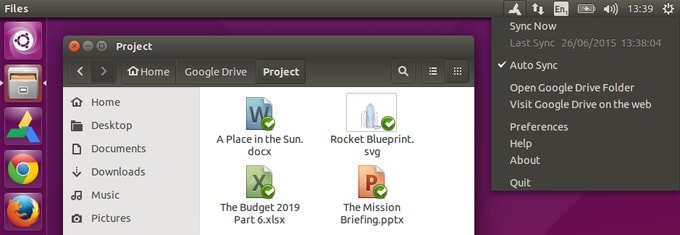
16. Best Google Drive Client – overGrive
Google Drive offers an official client for all the major OS except
Linux until now. As a Linux user, you have lots of ways and alternatives
for using Google Drive. There are many Google Drive Linux Client software available out there that can do the work for you seamlessly.
If you think Insync
– Google Drive desktop client is costly, then overGrive can be a good
alternative choice. You can enjoy all the features and tools that Insync
can offer but just for $4.99 one time payment. overGrive supports all
the major Linux desktop environments and distros. Download overGrive – Free Trial
17. Best Web Browser – Chromium or Google Chrome
Generally, web browsers allow you to visit a wide range of information by accessing the online web. As there is plenty of browsing software available for Linux, definitely it will puzzle you to choose the best one for your Ubuntu system.
Chromium and Google Chrome, Both the web browsers come with malware
blocking that ultimately ensures personal information security.
Moreover, there are lots of plugins in the chrome store which ultimately
let you increase the functionality of the browser in Linux system. Install Chromium on Ubuntu Linux
sudo apt install -y chromium-browser
Run the following command if you need flash support:
Linux Media Server software can help you to set up a cost and resource effective media server which ultimately let you watch or share or listen all the media files from a remote location on Smartphone or desktop. Kodi is one of the best free and open source media server software
available in the market. It offers an intuitive graphical user
interface with lots of customization options. Kodi is an all in one
entertainment software center which supports all the major OS including
Android, Linux, Windows, iOS, and MacOS. How to Install Kodi on Ubuntu Linux
You can easily install Kodi on Ubuntu and Ubuntu based on other Linux distros by running the following command:
OwnCloud is one of the popular and biggest open source community driven cloud software available in the market. It let you create easy to use a personal cloud server for both home and office use. You can also have full control over your data and who can have access at all. Download OwnCloud
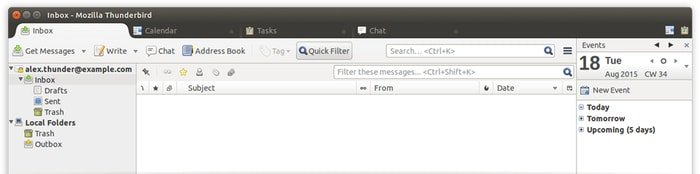
20. Best Email Client – Thunderbird
Thunderbird – Open Source Email Client
I believe you know about Mozilla foundation and its Firefox browser
which is lighting fast and patron of open source software. Thunderbird
is an amazing open source and faster Linux email client
from the same development house of Firefox. It’s a cross-platform,
faster, modern web email technologies for using email services. Download Mozilla Thunderbird
Remembering password is always difficult if you have multiple
passwords for various site and obviously, it is. So to mitigate this
sort of problem, password manager comes into focus. KeePassXC Password Manager is there for the Linux user for quite a long time and it fulfills the need successfully.
KeePassXC – an Open Source Password Manager for Linux Final Thought Do you Like our editorial list of
Best Linux Software? If you admire, then please share it with your
friends and family on social media. This tutorial will help you to save
lots of time for not searching best Linux apps all over the internet.
Just bookmark this page and install your desired Linux software in the
system. There are lots of other Best Linux software
available in the market. Did I forget to include any Linux apps that
you want me to enlist here? Let me know in the comment section and
definitely, it will be included in this content.
Note: The features mentioned here are not all-inclusive. The features
mentioned are compiled either from their respective official websites
or from my personal experience using them.
Lo primero que hacemos es copiar la carpeta fonts
de alguna computadora que tenga Windows.
Dicha carpeta se encuentra en la partición en que está instalado el sistema operativo
de Microsoft en el directorio Windows luego buscan
una carpeta que se llaman "fonts" .
Luego en GNU/Linux Ubuntu o Mint ejecutamos la terminal y escribimos :